
DIY/Crafting
December 3, 2022
Christmas Crafts With The Family
Have some holiday fun with these clever ideas!
Share


Snowmen Marshmallows
Are you looking for holiday activities to keep your kids in the Christmas spirit (and keep them busy)? Look no further!
We have some crafts that will add a sparkling, personal touch to your Christmas tree, and create adorable keepsakes that you and your children will cherish for years to come. In addition to adding personality to your decor, crafting can create an opportunity for some quality time to connect with your kids during the often hectic, time-crunched weeks leading up to the holidays. Follow along to see how you can make your kids merry and bright with these festive crafts!
Marshmallow Snowpeople
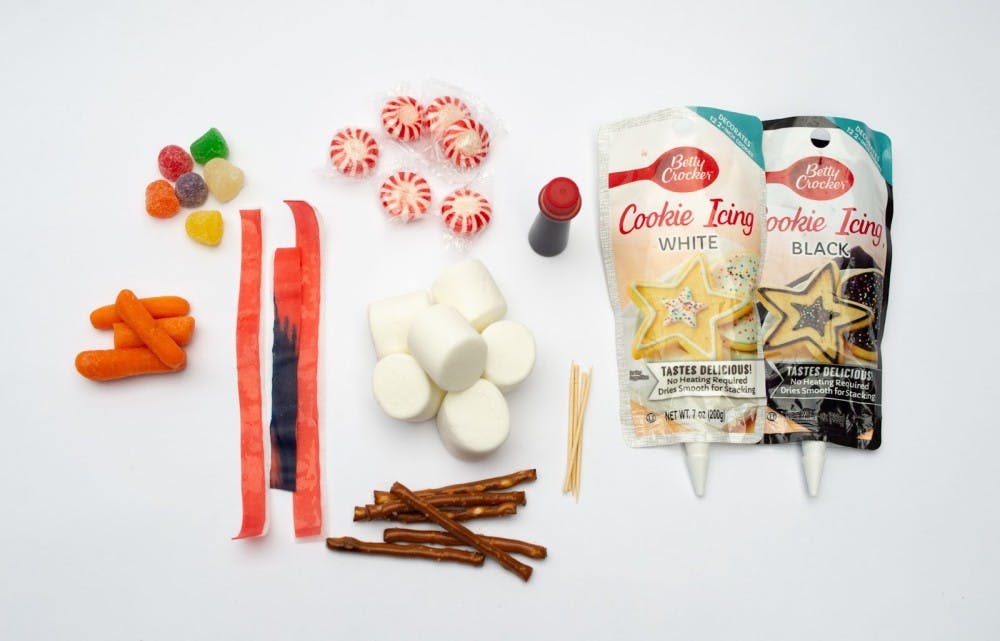
This craft is an easy DIY that requires only a few supplies that are easy to find at your local grocery store. These sweet items are tempting to eat while you craft, so keep an eye on your materials! You will need a bag of large marshmallows (for the body), black icing (for decorating), white icing or frosting, and optional food coloring if you want more color choices (for decorating and the “glue”), baby carrots or peppermint candy (for the nose), pretzel sticks (for the arms), gumdrops (for the hat), fruit leather or fruit roll-ups (for the accessories) and toothpicks (for application). You will also need a scissor or a knife to cut the fruit leather.
The first step is to create your snow person using three marshmallows. “Glue” them together using the white icing/frosting.
Next, create the arms. Break a pretzel stick in half and insert each side of the middle marshmallow. Voila!
Now decorate. Using the black icing, give the snowman some features such as eyes, a mouth or buttons. For a more detailed application, use a toothpick dipped in the icing. If you have food coloring, you can add it to the white icing to create more colors without having to buy a lot of different colored icing. In this example, we added some red to make one of the mouths. For the nose, you can slice a small piece of carrot or use peppermint candy to add some color. Pro tip: Use the toothpick to create a hole and some icing before inserting the nose to help keep it in place.
For accessories, cut a strip from your fruit leather to create a scarf, tie or bow, and use a little icing to keep it in place.
Lastly, add a hat! Again, using the white icing for glue, you can use a gumdrop or peppermint candy to add a fun topper, or even a peanut butter cup or a chocolate kiss. Be creative with whatever you have available. Just remember, the less handling the better, as the marshmallows can become sticky and the red from the peppermint can run, so best to keep little hands in the crafting area until they are washed!

Painting Ornaments
Painting ornaments is a perfect activity to stretch your child’s creativity, especially if they are elementary school level. The only supplies you need are some basic, plain ornaments, paint, and paint brushes. There are a variety of options to choose from in ceramic, glass, wood and even plastic. Set up a painting station for your kiddos by laying down some newspaper and let the creative juices flow! They can paint their favorite Christmas characters: snowmen, Santa, elves, reindeer and more. You can also add a little sparkle and let them experiment with glitter. Warning: You may find glitter for weeks, but it will be worth it to create those great holiday memories, right?
The Classic Reindeer Clothespin
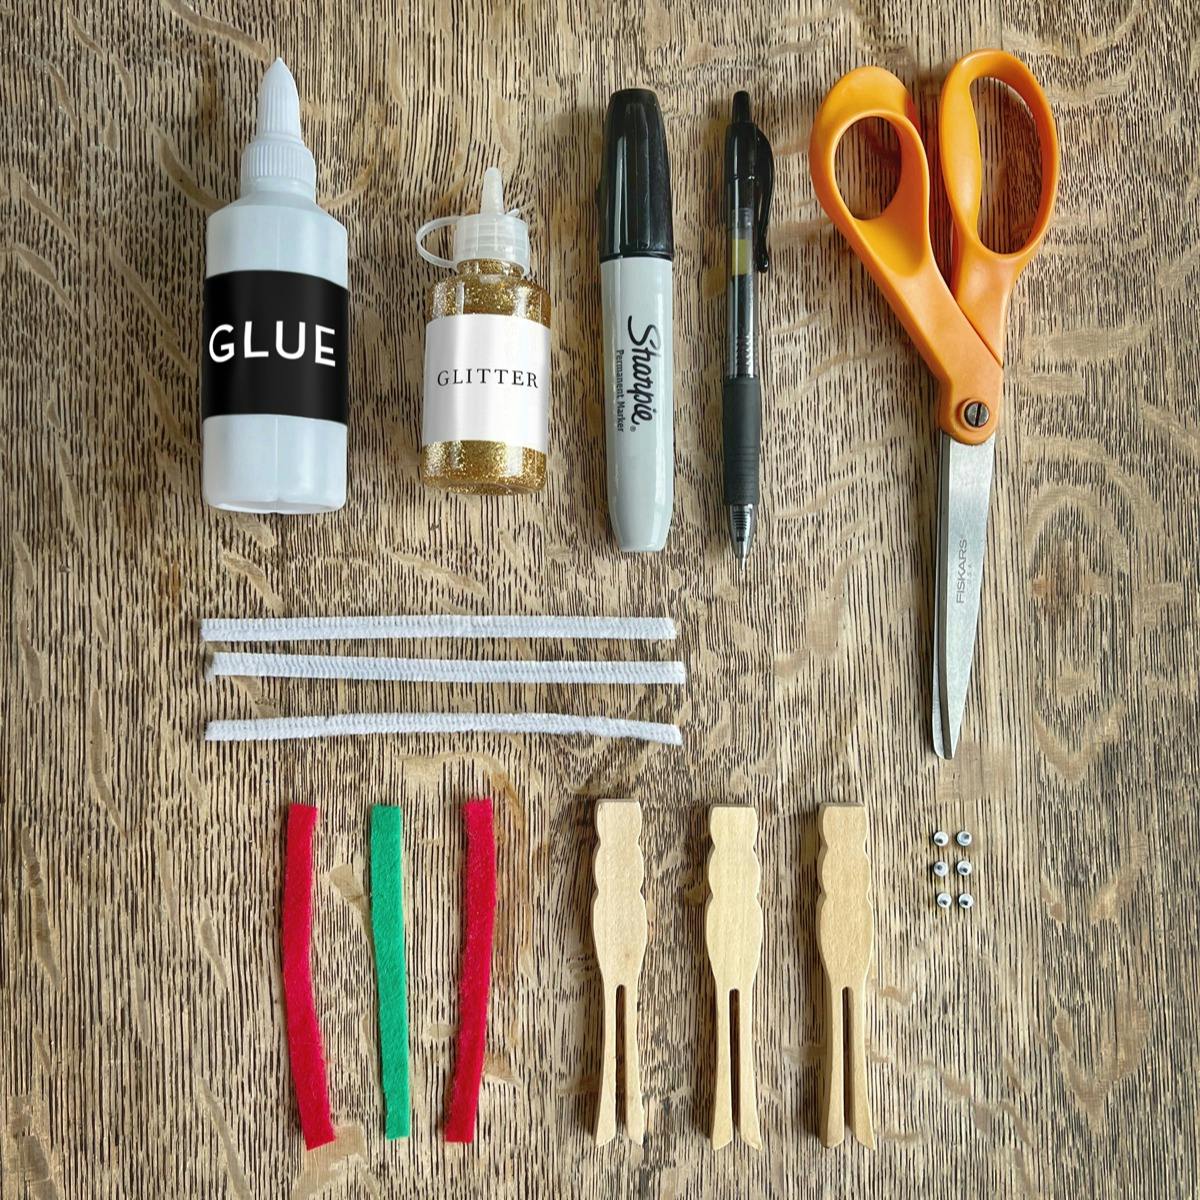
Creating cute clothespin reindeers always brings Christmas cheer! While there are many variations on this classic, the key supplies you’ll need include: wooden clothespins (for the body), pipe cleaners (for the antlers) small googly eyes, felt or ribbon (for the scart), tacky craft glue, small pom poms or beads, a black pen and marker (for the brows, mouth and hoofs) and glue. You will also need some string to make your loop to attach it to the tree.
We recommend two prong clothespins for this project, which are available at most craft stores.
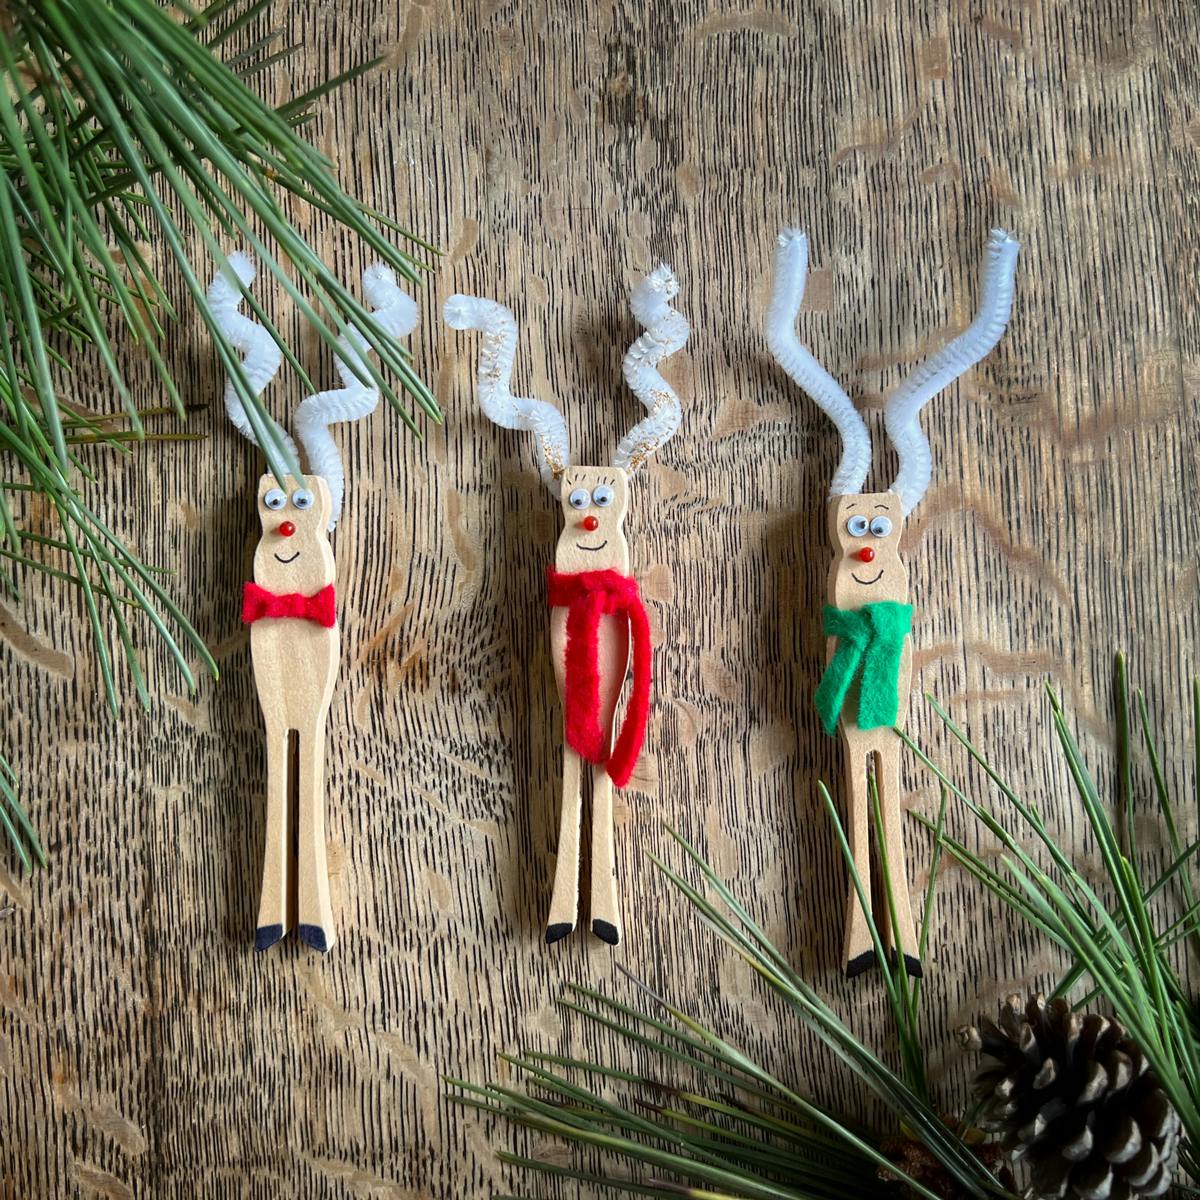
Antlers first. Cut your pipe cleaner to 6” long. Twist the pipe cleaner around a pencil to create a spiral and then bend it into a “v” shape with equal lengths on both sides. Put them aside.
Next, color the bottom prongs of the clothespin with your sharpie to create the hoofs. Easy peasy!
Now, work on your reindeer’s face. Glue down the two eyes and nose. For the nose, use a pom pom or a bead. Let it dry, and then use your pen to draw the mouth. You can give your reindeer expressions by drawing in eyebrows and eyelashes too!
Don’t forget to dress up your reindeer with a piece of felt or ribbon that can become a scarf or even a bow tie. Have some fun with it!
Finally, glue your antlers onto the top, back of the clothespin. (You can even add a little glitter for sparkle) This is also where you will glue on a loop to attach it to your tree. You can use whatever you have… a piece of clear string, baking string, twine or even gold chord. Make sure to let the glue dry completely before you attempt to move or hang it.
Reindeer clothespins can also be a fun, homemade embellishment for gift wrapping!
We hope you have a magical time with your kids creating these cute crafts.The time you spend together will create Christmas memories that will last forever, and the ornaments will reflect those priceless moments for years to come!

